

How To Digitally Draw Water At Night
In this commodity, I volition use the illumination brush to paint a night scene.
The illumination brush makes it like shooting fish in a barrel to create a photo-like bokeh effect.
There are two types of illumination brushes, round and diamond, just nosotros will use the round type.

MB905531 Bokeh
Download this "MB905531 Bokeh" from Cloud Brushes.
Let'southward paint a nighttime scene!
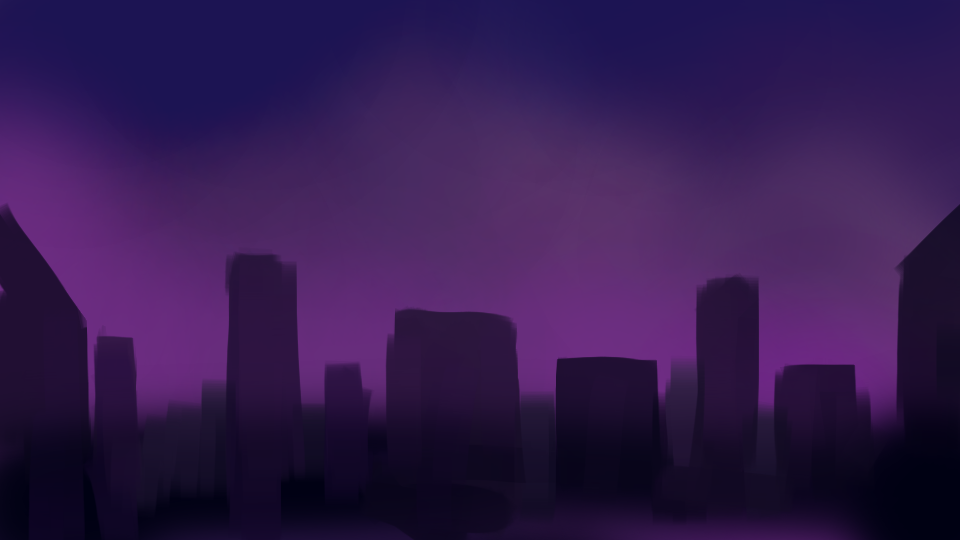
Let'due south paint a silhouette of the dark sky and buildings!
Beginning, draw a rough silhouette of the night sky and buildings.
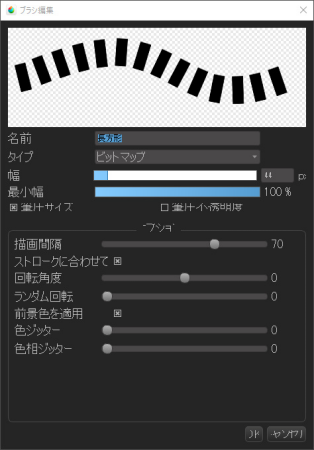
For buildings and other structures, you can annals a square image in the brush and pigment it to brand information technology easier to draw angular edges.

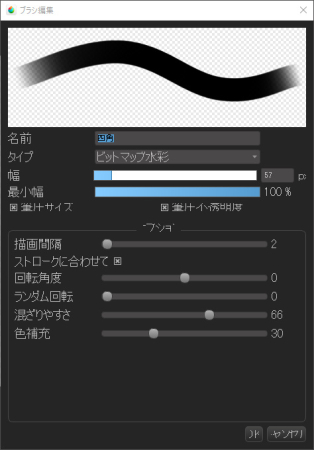
From the brush settings, I prepare the minimum width to 100%, the painting interval to ii, and the type to bitmap watercolor.
Prepare your own brushes for the windows
Next, we will paint the window lights on some of the buildings.

The windows of the building were likewise created by registering a rectangular shape to my own castor.
Y'all can hands paint the window by adjusting the brush control.

The point is to take a drawing interval and a minimum width of 100%.
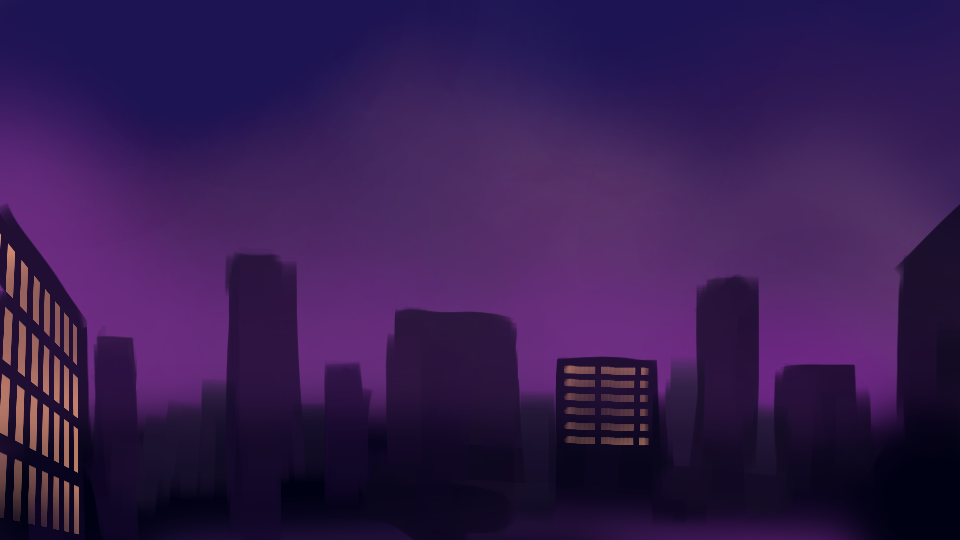
Permit's describe some window light!
Now let'due south depict in the window.
Create a new layer and use the window castor to describe a direct line while holding downwards the Shift central.
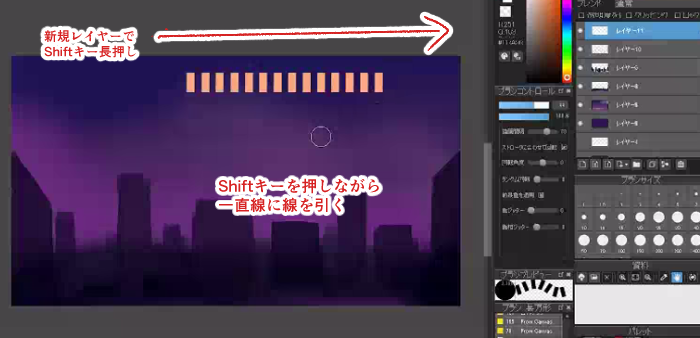
Re-create and paste the layer and use the motion tool to shift information technology by i level. Now you take two layers of windows.

I copied and pasted the aforementioned matter to create a four-level window.

Merge the copied and pasted window layers into a single layer to keep them together.
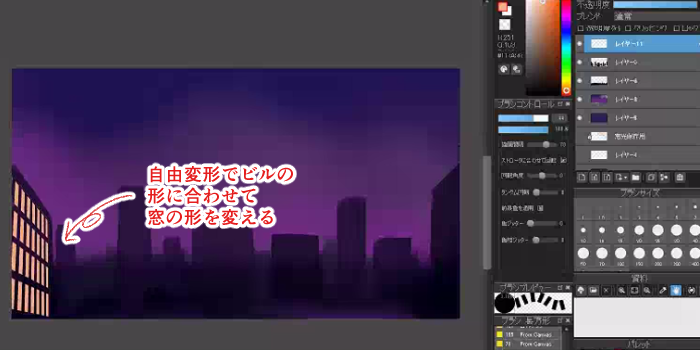
Paste the window in a free transform to fit the side of the building.
If it's not bright enough, copy and paste the layer and modify the layer blend to screen, additive or luminous and layer information technology.
In the same fashion, let's add window light to the other buildings.
Blurring the windows
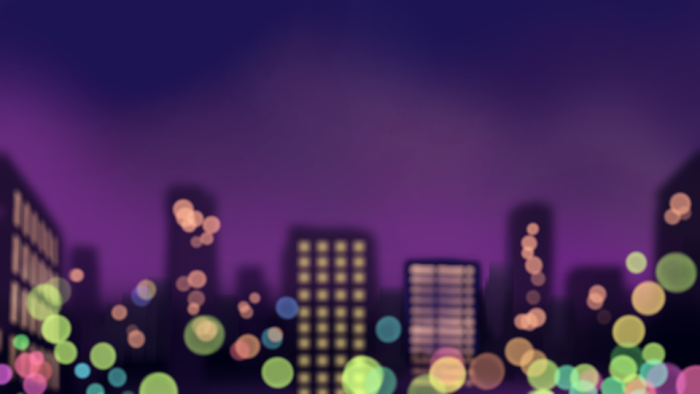
Once the windows have been drawn in, we can apply mistiness to them.
On the merged window layer, select "Lens Blur" from the menu filters.
Lens blur can be used to emphasize light and blur it while retaining its roundness.
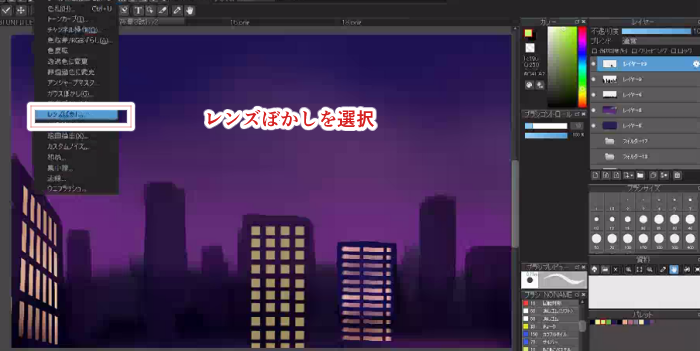
Adjust the radius and brightness of the lens blur.
Hither nosotros ready the radius to 6.17 and the brightness to two.91.

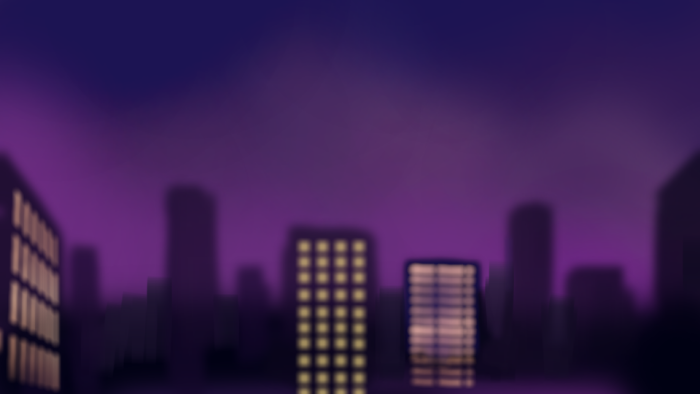
The window blur is now consummate.

Mistiness the silhouette of the building
In the aforementioned manner, we volition use blur to the silhouette of the building.
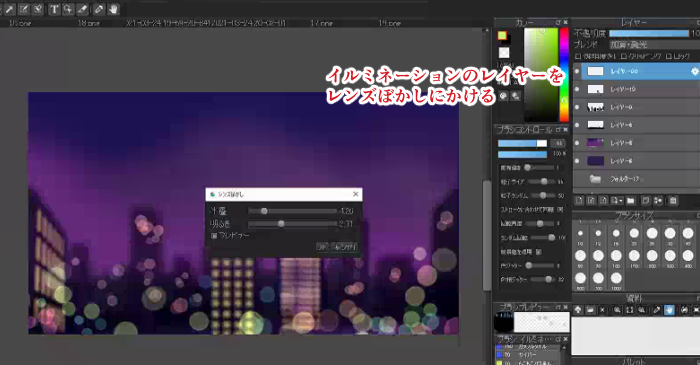
Add ball bokeh with the Illumination Brush
Finally, let's add the ball bokeh with the illumination brush.
The settings for the illumination brush this time are as shown in the image below.
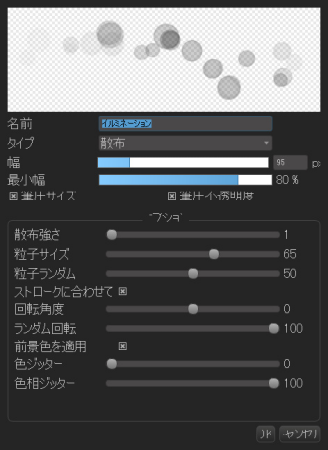
The illumination castor is used to place lite along the silhouette of the building.
Information technology is recommended to apply "Hue Jitter" from the brush's control panel to make the color more colorful.
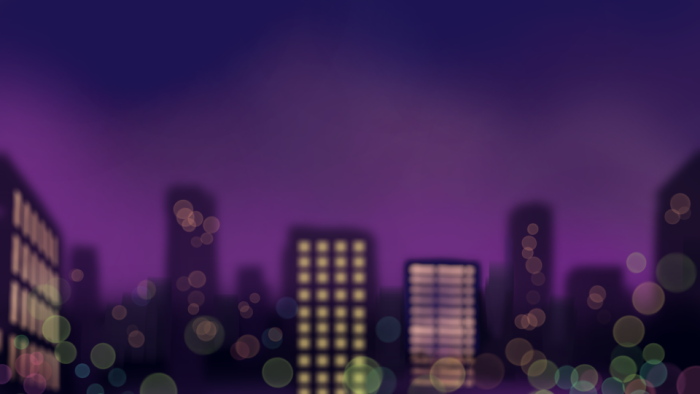
Mistiness the illumination layer with lens blur.
Illumination is now complete.
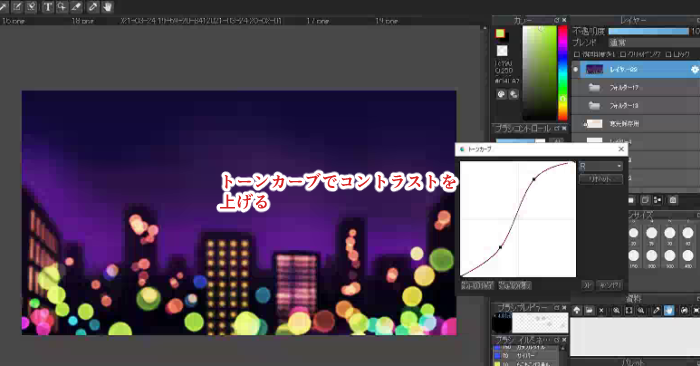
The terminal step is to make some fine adjustments.
We will merge all the layers and increase the contrast with Tone Curve.
The tone curve should be a gentle S-shape, every bit shown in the image, to make contrast easier to reach.
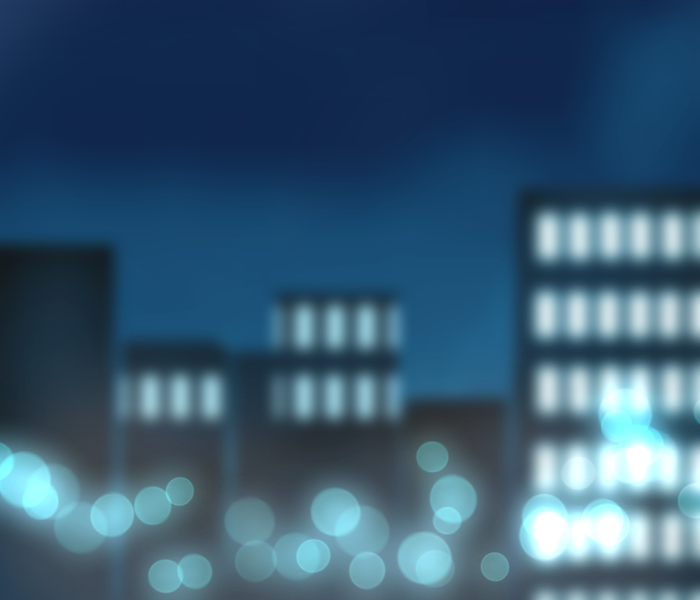
Finally, a cover-up layer to add together some brightness to the groundwork of the edifice and we're done!
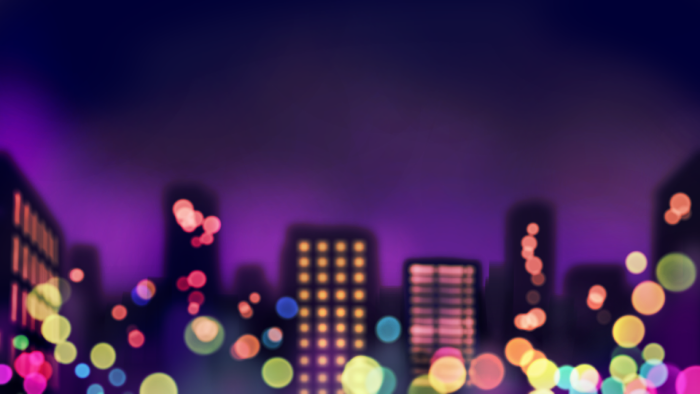
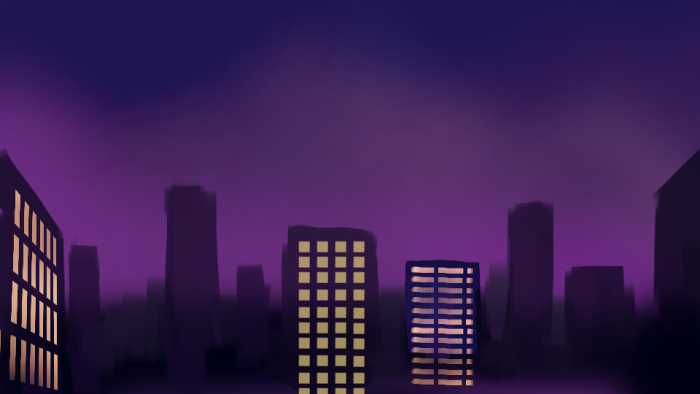
Now nosotros have a dark scene with a photograph-realistic bokeh event!
Let's utilize the illumination brush to create various night scenes!
The above is an introduction to painting night scenes with the Illumination Brush by calculation ball blur.
If y'all apply it, y'all can draw various kinds of nightscapes!
I hope you'll all give the Illumination Castor a try!
(Text and pictures by Setsu Yoshida)

Source: https://medibangpaint.com/en/use/2021/05/how-to-paint-a-night-scene-with-a-brush/
Posted by: stewartquidents53.blogspot.com
0 Response to "How To Digitally Draw Water At Night"
Post a Comment